Grind Your Own Grains for Butternut Squash Pizza
Last Updated October 3, 2017 · First Published October 21, 2011
Laura Fuentes is the Chief Mom at MOMables™, a weekly lunch meal-planning service. A wife, mother of three and a lunch enthusiast who insists on healthy, wholesome food for her family. On her personal blog, Super Glue Mom she writes about motherhood, green living, deadlines and keeping her cool, even when her kids super-glued her hair. She’s also a food contributor to numerous sites, and helps parents overcome the difficulties of cooking for picky eaters. You’ll find her on Twitter at @supergluemom and @MOMables.
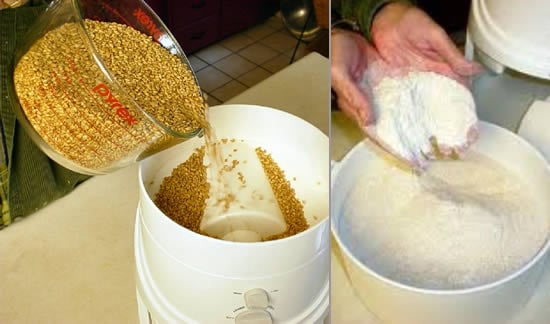
When Andrew kindly invited me to guest post I was slightly nervous. I asked him several times what I should write about and he asked in return about the single most important change I’ve made that has led me to live a more unprocessed lifestyle. I didn’t have to think twice when I answered: The purchase of my grain mill.
I’ll admit that I haven’t always cooked from scratch in the past. It’s not from the lack of knowledge, but from living a busy, productive, American lifestyle. I was born in Spain and raised by my grandparents who constantly talked about the “great depression” and the importance of knowing how to grow, care, and cook our own food as means of survival. I learned my way around the kitchen those early years but soon abandoned most of my grandmother’s traditional cooking when moving to the States in my early teens.
I currently live in Southern Suburbia, north of New Orleans, where everything is buttered, smothered, and buying packaged meals at Whole Foods is a status symbol. Two years ago, both of my kids entered a picky-eater stage and I began to struggle making my kids’ lunches with foods that were not processed and I realized that our entire eating habits needed to change.
A large portion of processed foods involve some type of grain, so the first thing in my purchase list was a grain mill. It’s been a year-long learning curve to adjust traditional baking recipes to freshly milled flour. If you are thinking about purchasing a grain mill but can’t decide on which one to buy here are a few tips to help you make that decision:
- Decide if you want a manual or electric mill. A manual mill might be more affordable, but in some models you’ll need to grind the wheat twice to make fine enough to yield flour you can bake with. Think about how convenient you want the process to be and how much baking you’ll do.
- Determine your commitment. When I told my husband I was going to spend $250 on a grain mill he took a deep breath and said, “If you are committed to using it then…Ok. If not, get the $69 hand one.” I am committed! I shouted. Therefore, I chose a NutriMill
because of its lifetime warranty and easy of use.
- Be realistic on what you will mill with it. My grain mill has become my own great big, fun experiment. I now bake with gluten-free flours by milling all sorts of gluten-free grains and beans! This is a great option if you must follow a gluten-free lifestyle but are horrified at the cost of gluten-free mixes. My neighbor used to pay me $5 each week to mill her rice and beans so she could make her own mixes for her gluten-intolerant husband (if he was allergic she’d have to get her own mill because I mill regular grain in mine).
While the 100% whole grain taste took a bit of adjustment for my southern kids to get used to, they no longer complain and actually enjoy eating what I make! Frozen waffles are a thing of the past and pancake night has never been more fun. The freezer has become my best friend since I make scones, honey whole-wheat bread, waffles, pancakes, pizza dough, pita bread, focaccia, and 100% whole wheat bread in my bread machine (during hot summer months).
Another benefit? Pizza night is the best entertainment for our friends and family! Our friends joke that there is a waiting list to get into our Friday pizza night! Yes, I’ve even figured out how to get my pizza to taste like one of those at a brick oven restaurant! The grain mill has been a success all around!

Butternut Squash Pizza
Makes 3-4 thin crust pizzas.
Toppings are adapted from Real Simple.
Ingredients
Dough
- 1 1/2 tsp. Instant or Active Dry Yeast
- 1 1/2 cup Warm Water
- 1 Tbs. Raw Honey, helps activate yeast
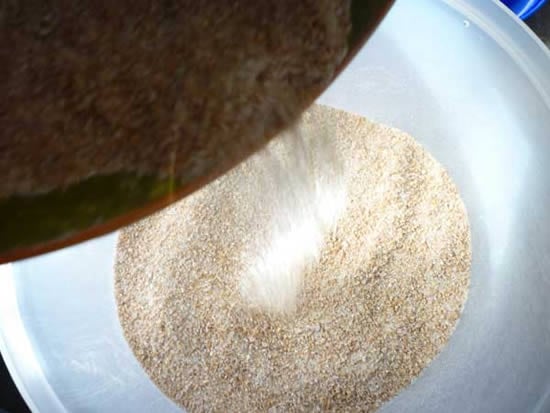
- 4 cups Whole-Wheat Flour, milled finely, if you mill your own
- 1 tsp. Coarse Sea Salt
- 1/3 cup Extra Virgin Olive Oil
Butternut Squash Toppings
- 1 Butternut Squash, about 2 pounds, peeled
- 1 small Yellow Onion, sliced into 1/4-inch-thick rings
- 2 Tbs. Extra Virgin Olive Oil
- 1 1/2 tsp. Coarse Sea Salt
- 1/4 tsp. freshly ground Black Pepper
- 1 Tbs. fresh Thyme Leaves
- 1/2 cup fresh Buffalo Mozzarella
Instructions
Dough
- Add honey to warm water (between 115-130 degrees), dissolve and add yeast. Let stand for ten minutes, until foam develops on top (this is your cue that yeast is fully developed in water).
- In a mixer, combine flour and salt. With the mixer running on low speed (with paddle attachment), drizzle in olive oil until combined with flour. Next, pour in activated yeast/water mixture and mix until the dough comes together in a sticky mass.
- Coat a separate mixing bowl with a light drizzle of olive oil, and form the dough into a ball. Toss to coat dough in olive oil, then cover the bowl tightly with plastic wrap and set it aside for 1 to 2 hours to rise, or store in the fridge until you need it.
- Pre-heat oven to 500 degrees Fahrenheit and set pizza stone in there to heat thoroughly.
- When you are ready to make the pizza, grab the pizza dough and knead for a minute or two. Break into individual sized pizzas and roll out to a thin dough on floured surface.
- Transfer to floured oven paddle before adding toppings (the back of a cookie sheet works too).
- Add toppings of choice or check out this delicious butternut squash pizza recipe (below).
- Bake at 500 degrees on pizza stone for about 7 minutes, until crust is golden brown and the cheese is bubbly.
Butternut Squash Toppings
- Cut the squash into 1/2-inch-thick slices, and then cut each slice into 1-inch chunks. Place the squash and onion on a baking sheet. Drizzle with the oil, season with the salt and pepper, and toss.
- Roast until tender at 375 degrees Fahrenheit, about 20 minutes. Transfer to a plate.
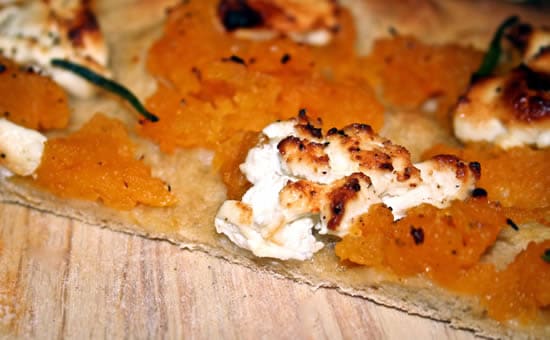
- Top pizza dough with roasted squash, onions, thyme leaves and fresh mozzarella.






I have been thinking about a grain mill for months. I’m going to use this excellent article and recipe to get my husband on board! Thank you!
Cathy, glad you made it over to the grain mill side! 🙂
love the recipe – and I’ve been thinking for months about a grain mill – done deal now 😉
Nice post. I never thought of turning up the heat so high — or putting honey in the dough. Sounds great. We’re ready to bring on the pizza!
Thanks! a simple twist on this is to substitute goat cheese for the buffalo mozzarella. It’s delicious both ways!
Amen!! It’s incredible the difference in flavor when you mill your own grains. Can’t wait to try this recipe!