Organizing your Kitchen for a Successful October Unprocessed Challenge
Sep 29, 2018
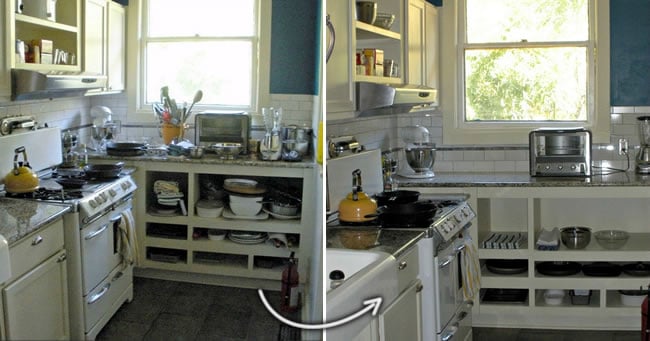
October Unprocessed is one of my favorite challenges of the year. Having a well-organized kitchen will help you so much in carrying out your challenge. You’ll spend a lot of time in your kitchen during the month. Let’s start by turning it into an organized space you’ll love.
I recommend beginning with the pantry if it’s not already organized. Getting the food under control makes the rest of the kitchen easier to organize. (As well as sets you up for an easier challenge!) Here’s my post on organizing for an Unprocessed pantry.
Now on to the kitchen!
First, some game rules:
- Think about the tasks that happen in your kitchen. If an item doesn’t support one of those tasks then it needs to live in a different room.
- Keep only the items that you need, use, and love. Do you really need it? Do you really use it and does it work properly? Do you really love it? Anything that is a “no” goes.
- Let go of any cutesy, specific “one use” items like banana slicers, tea bag squeezers and the like unless you absolutely love it and use it regularly. These things most often just waste space and money.
Now that we know what to keep or let go of, it’s time to put it into action.
Step One: Wash your dishes.
It’s important to start with a clean slate. This way we allot the proper amount of space to everything that will be put away.
Step Two: Clear off the countertops.
Start at one end and systematically work your way around the room, focusing only on the countertops. Toss any trash. If you find items that live in a different room, put them in that room. With remaining items that will live in the kitchen but not on the counter, group like with like. These items will be added to their mates when we get to Step Four.
Step Three: Work through the cabinets and drawers.
The main goal of this step is to create space. Start at one end of the kitchen and systematically work your way around the room, cabinet by cabinet, drawer by drawer removing anything that doesn’t fit the game rules. To keep easy track of progress, I like to open all the cabinets and drawers then close each when that spot has been weeded.
Step Four: Sort like with like.
Using our same, systematic circle work your way around the room again. This time you’ll sort all like items together: glassware, baking items, pots/pans, dishes, etc. In small kitchens I may pull everything out, but I most often leave the items in the cabinet during this stage. When everything has been sorted, do another quick purge. It’s easier to let go of things when they’re paired up and you realize you have 12 butter knives.
Pro tip: plastic ware. Keep the lids together with each item. Otherwise, it’s just a matter of time before you’ve got a ton of lids and a lot of containers and nobody goes together. Go through and pair everybody up. Toss what doesn’t have a mate.
Step Five: Organize the remaining items.
Now that everything is pared down, it’s time to decide the best place for the categories to live. To determine the best locations, think about how you want to function in the kitchen.
- Where do I want to reach to get what? Mentally walk through your entire meal: Where will I reach to get my food, spices, pots and pans. Now my meal is cooked so where do I want to reach for my serving bowls, plates, forks, cups. Now I’ve finished dinner. Where do I want to reach for my Tupperware for leftovers? So on and so forth.
- The more often you use something, the easier it should be to access. Daily use items may live on the counter. The less something is used, the further away it can/should be. (Example: entertaining items on out of the way shelves or hard to reach top shelves.)
Once you’ve decided the best location for the categories, place them there. If I’m doing big switches in a client’s home, I’ll use sticky notes to temporarily label cabinets while we go through the shuffle.
Pro tip: if you make some big changes with the locations of things, give yourself a little time to let the new flow settle in before deciding if it works or not. If the spot promotes better flow then it won’t take too long to get used to. If not, then just find a better place.
At this time if you decide you need additional containers to make life easier (ex: pot lid rack) now is when to purchase and install. Don’t purchase before this point because you may end up with something you don’t need. However before you purchase, check to see if anything you already own can be creatively repurposed? That cute cake stand that only gets used once or twice a year can be darling to hold your spices on the countertop.
Finally, don’t forget to maintain your hard work! Make sure that you take a little time at the end of each meal – and ESPECIALLY at the end of each day – to put everything back where it lives. This can be done quickly during commercial breaks. If you’re watching something recorded then hit pause for a few minutes while you put everything away. Daily maintenance assures you to never have an overwhelming kitchen again!
Happy challenge! If you have any questions please ask in the comments below. I’d also love to hear about how the organizing goes for you and helps your challenge!



The best Organizing Kitche ^_^
Hi, I’ve taken the October Unprocessed pledge for the second year and have been getting my kitchen ready! Have ditched some very old probably not BPA free plastic food storage containers and have more room in the cupboard.
I’d like to make a book suggestion. It seems to be in keeping with unprocessed food. It’s by Dr. Fuhrman and is his latest: The End of Dieting: How to Live for Life.
The book advocates a mostly plant based diet. I have been following the plan for 18 months and feel great. I’ve also lost weight, and have lost my sugar and salt craving. Great recipes from mostly whole foods. It may not be for everyone but it is science based and works for me.